Foot-panel Design for MIOCT System
Needs Statement
Since the surgeon's hands are fully occupied with surgical tools and must remain sterile, commercial surgical microscopes employ sophisticated foot-operated controllers to allow the surgeon to control the microscope head’s location/translation, zoom and focus settings. Similarly, we need to develop a custom input device to enable surgeons to control the OCT system.
Initially, we will use commercially available components such as buttons, joysticks, and pedals in a layout like the microscope’s native foot controller, both to reduce the learning curve needed for surgeons and with an eye toward eventual integration of the two different controllers.
Design
I work at Professor Izatt's Lab for MIOCT Project. I am doing the hardware design for foot penal control. Here is my design process and deliveries. All functions were assigned based on the function map.

Prototype
First version of Prototype is made of wood board, We studied the layout of the Leica pedal and decided not change too much on the layout, considering sugens are used to that. We quickly made the first prototype for function validation and get feedback from our software compatibility. We also gain first round feedback from the clinicians.
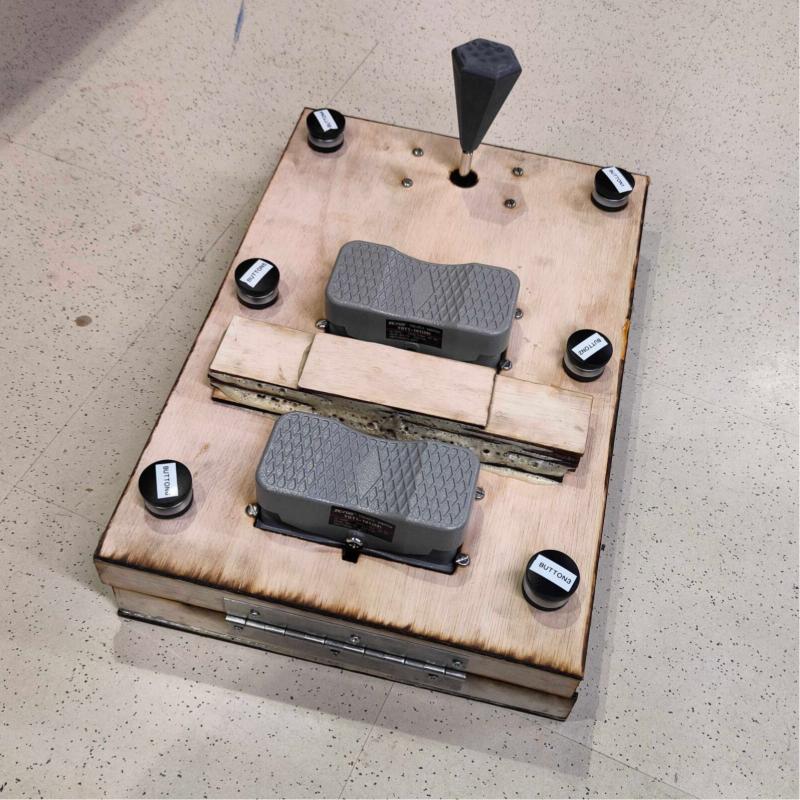
Clinicians' feedbacks for the first prototype:
1.Buttons with a pronounced click would be nice (but not necessarily harder to press)
2.Foot pedals feel wobbly/clunky
3.The height difference between the bar and the components is not large enough. Either the bar needs to be higher, or all the components need to be lower.
4.The joystick needs to come closer to the pedals
5.Entire thing needs to be as small as possible to save space on the ground
Also we found it is hard for us to assemble all the part onto the top cover since we have to flip the cover over for multiple time during the assembling.
The second version is made of Acrylic board. we applied those advices for the layout change and button change. I introduced a mid layer to solve the relative height difference issue as well as the assemble problem. All the electric components were installed on the midlayer it and there is no need to flip over the cover for assembling.


The Initial Prototype
(Laser cutting)
The Second Prototype
(Laser cutting)
The Third Prototype
(3D Printing)
The Final prototype
(Sheetmetal & welding)
Create Your Own Website With Webador